Running Sepia
This section covers how to specify scenario configurations and how to use Eclipse to run a scenario.
SEPIA Working Directory
All of the directories specified in SEPIA configuration files or on the command line are relative to the current working directory. For example if you are in the directory "mydir" and the configuration file specifies the map "data/map.xml" then SEPIA will look for the map in mydir/data/map.xml.
If SEPIA is complaining about missing maps, configurations or agents please double check which directory you are running the application from. Next make sure that your class path variable includes the SEPIA.jar file and any folder structure containing .class files. Finally check all configurations to make sure that file locations are specified relative to the directory SEPIA is run from.
Adding a Map
In order to begin testing our agent we will need a test map and a test configuration. First create a data folder in your project in the same way we created the lib folder when setting up the project. Then click here to download the example map Extract the files to the new data folder.
Open up the ResourceCollectionConfig.xml file. This XML file
specifies the map, the agents used, the goals of the scenario and
extra parameters about how many episodes of the scenario to run before
quitting.
The most important tag is the <Player> tag. The ID attribute
specifies which player this agent is controlling. This is the same
number passed into the constructor of your class. Also look at the
<ClassName> tag. This specifies the Java class path to the agent
class that controls the player.
You’ll also notice that player 0 has two agents: VisualAgent and ResourceCollectionAgent. ResourceCollectionAgent comes with Sepia as an example. It contains an agent that controls a few peasant units to collect some gold and wood. VisualAgent is a special agent. It will open a Java Swing window that gives a visual representation of the game. There are two argument parameters to the VisualAgent. Setting the second one to true will allow you to control the units of the VisualAgent’s PlayerID.
Running Resource Collection Agent Example
To run SEPIA first highlight the Sepia.jar file in the Package
Explorer. It should be under the Referenced Libraries folder. Then
click the green Run arrow on the menu bar
This will open a dialog box. Select Java Application and then
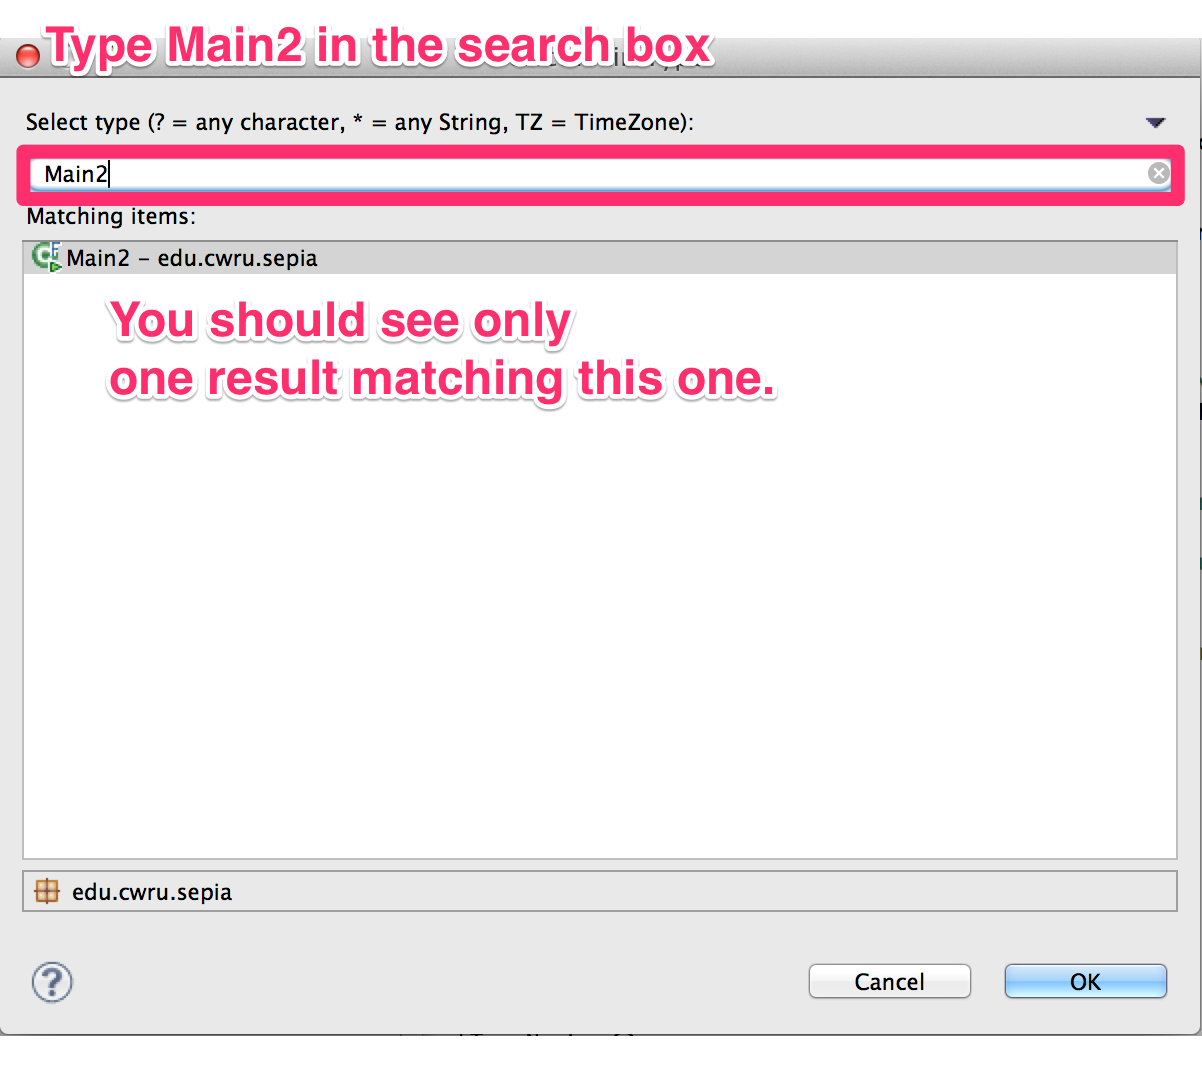
click ok. Next you will see a box with a few of the built in SEPIA
Classes. Select the Main2 class.
This should open a Console tab at the bottom of eclipse that will
complain about no configuration file being specified. To fix this
click Run->Run Configurations in the main menu. This will allow
you to edit the run parameters to specify things like command line
arguments and working directories. Under the Java Applications
category on the left there should be a Main2. Click on that to
edit the run configuration.
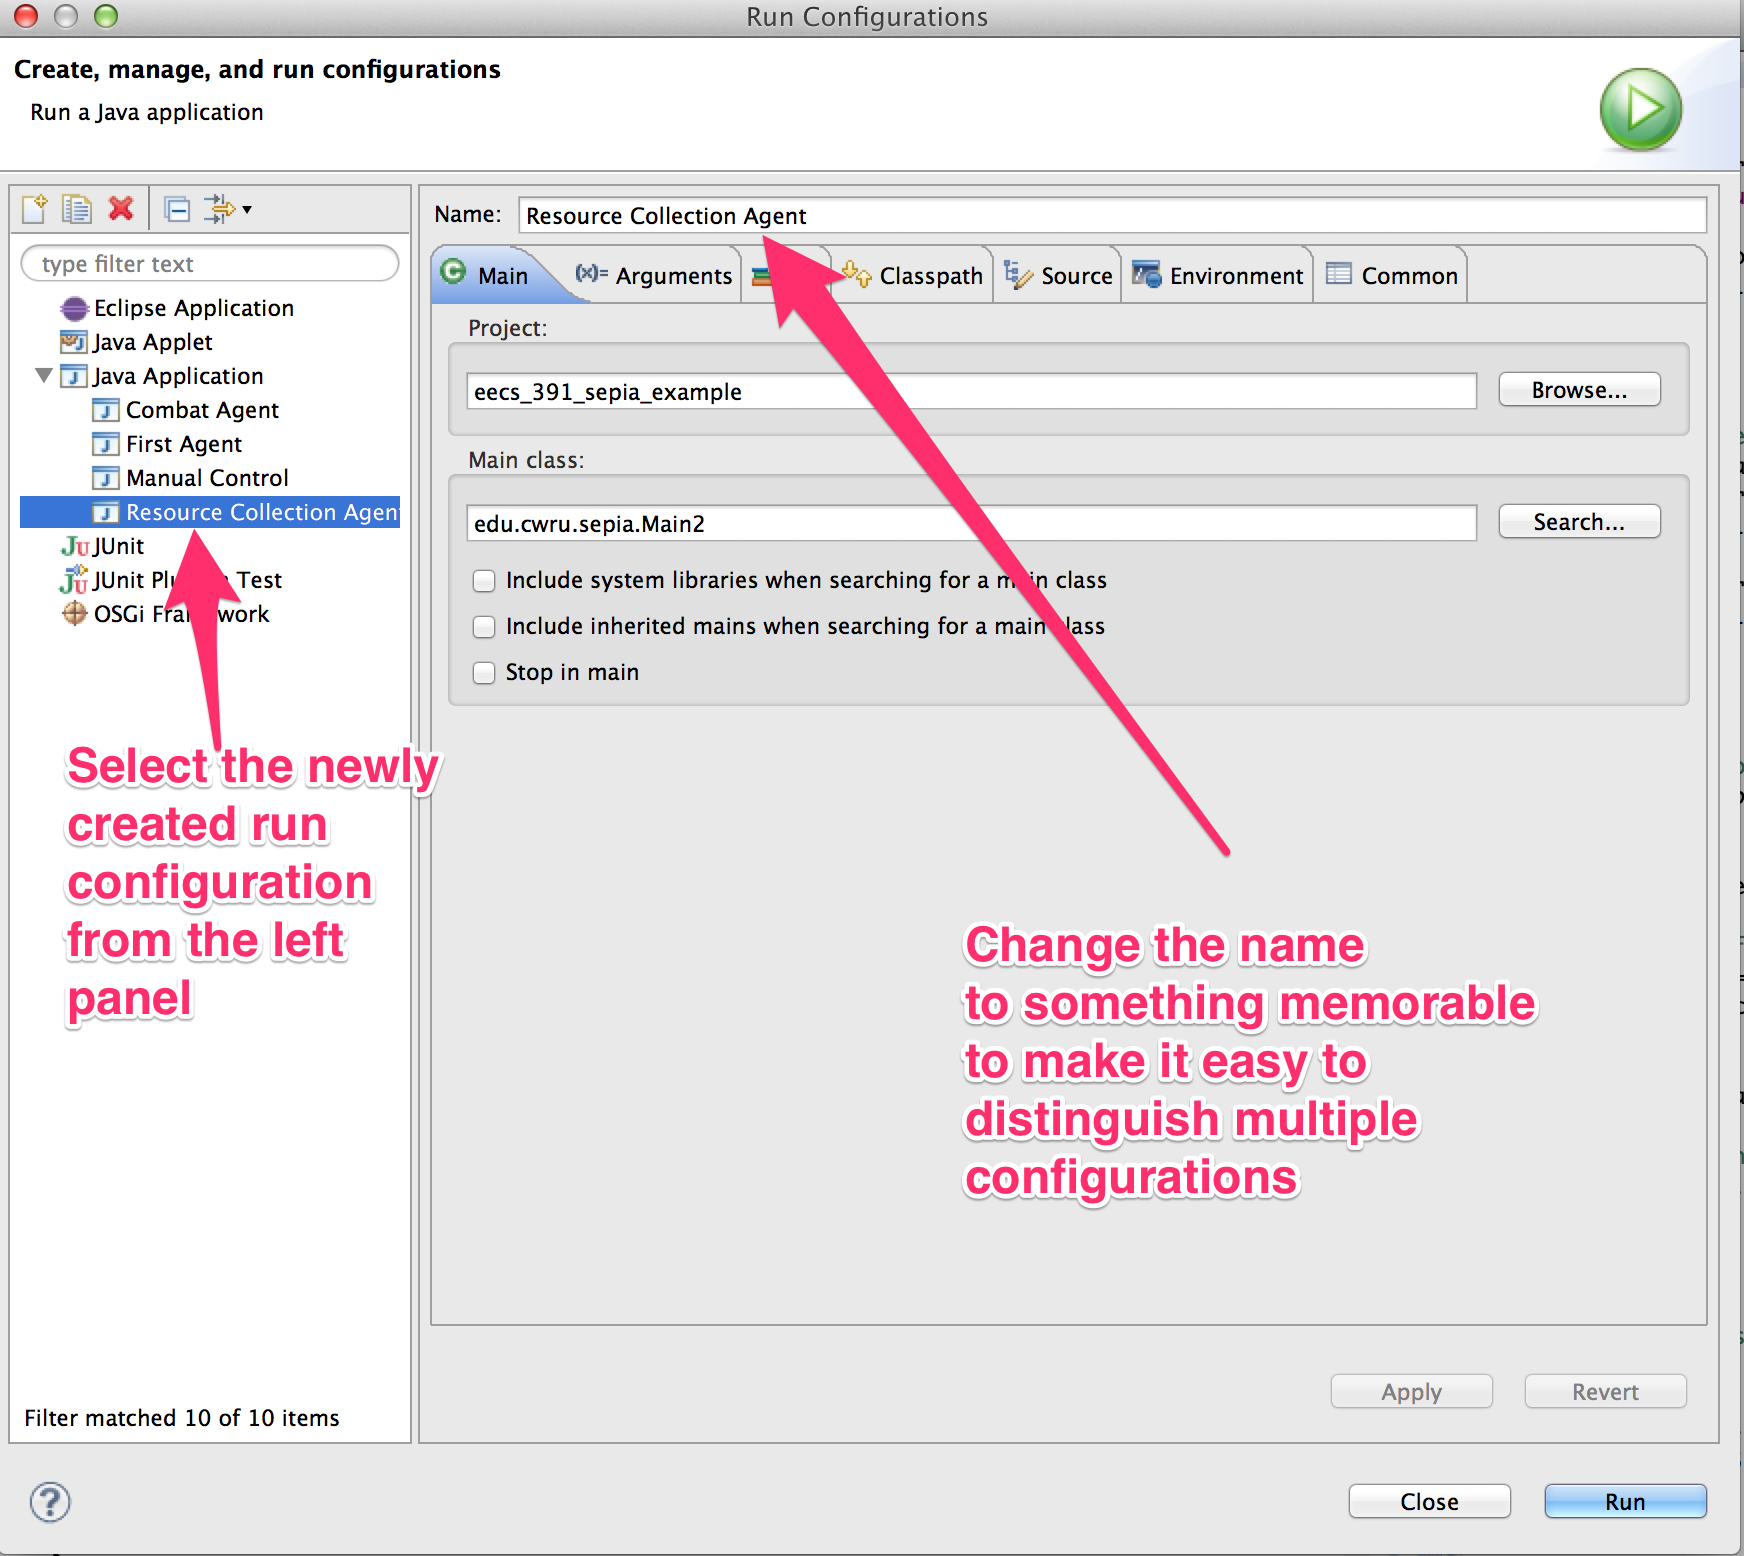
First give this a useful name. Change Main2 to something like
“Resource Collection Agent”. Then click on the arguments tab and in
the Program Arguments box type
“data/ResourceCollectionConfig.xml”. Click the Apply Button and
then click the Run Button. This time a window should open up.
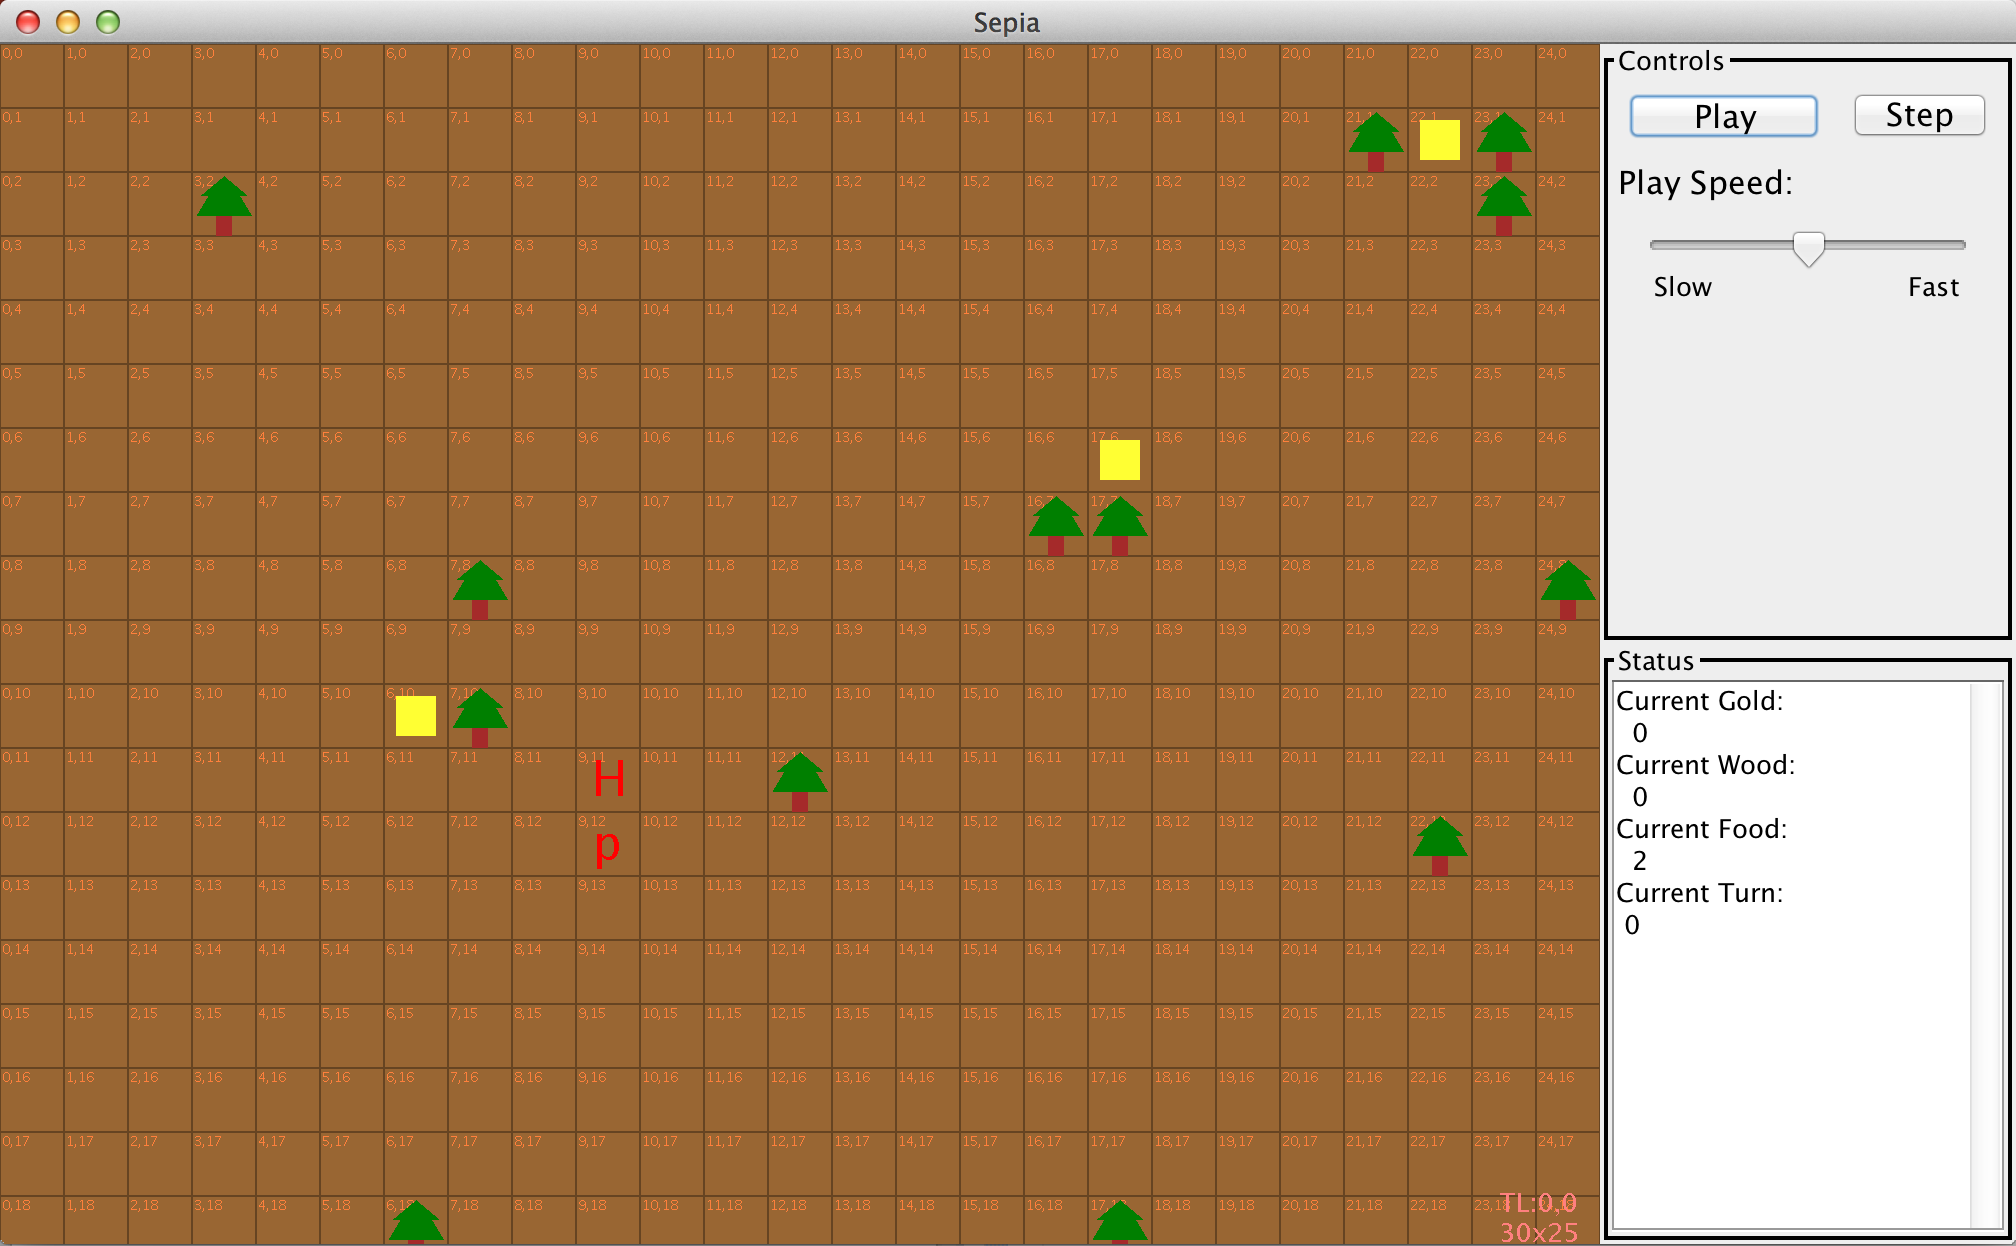
This window is the Visual Agent. You’ll see yellow squares, trees and
some letters. The yellow squares are gold mines, the trees are wood
sources. The P is a peasant unit and the H is the Town Hall
unit. Click on the Play Button to run the scenario and see the
agent in action. You should see the Peasant begin moving to the gold
mines and trees. If you look on the right side of the screen you can
see information about how much gold, wood and food you currently have.
Note
The food number is actually the amount of food in use. There is a food supply cap in the game code (which starts at 4 in this scenario). Agents can create units that use food up until the supply cap. Unfortunately as of this version of SEPIA nothing displays this supply cap. However, you can access the supply cap amount in the agent code.
Manual Control
Now lets create an alternative run configuration for the VisualAgent
so you can manually control the peasants. Again using the main menu
click Run->Run Configuration.... Find the Resource Collection
Agent configuration then click on the duplicate button. Change the
name to something meaningful (in this case “Manual Control”). Then in
the Arguments tab change the value of the Program Arguments to
“data/ManualControlConfig.xml”. Finally click Apply and then
Run. This time if you click play nothing will happen. First left
click on the peasant to highlight it. Then right click on one of the
gold mines and select “Gather GOLD_MINE”. Now if you click play the
Peasant should move to that gold mine and begin collecting
gold. Double clicking on the peasant will show its unit id, its health
and what resources it is carrying. You can control any of the units in
this way in order to manually try things out in the game.
Configuration File
The configuration file specifies the parameters of a SEPIA scenario. This includes specifying which map to use, which agents to run and the termination conditions for the scenario.
Open data/ResourceCollectionConfig.xml file in Eclipse to follow
along. Each configuration file has the root tag of
<Configuration>. All other tags are children of this tag.
Use the <Map> tag to specify the location of the map file with
respect to the directory you will be running SEPIA from. In this
example the working directory is the main project directory and the
maps are all under the data folder. So the map name is prepended with
data/.
Use the <Player> tag to specify agents. The Player tag has a
required attribute Id. This should be set to an integer that is the
player number. In general there will be two players on the map. Your
player will have playernumber 0 and the enemy will have
playernumber 1.
Inside the Player tag is the <AgentClass> tag. This class specifies
which Java class will control this player number’s units. Inside the
AgentClass tag you must specify the <ClassName> tag. The text of
this tag is the fully qualified name of the Java class. So if you have
a .class file in the subfolders edu/cwru/sepia/agent then the text
will be edu/cwru/sepia/agent/MyAgent.class. If you had your class
file in the top directory it would be MyAgent.class.
In addition to the required ClassName tag you can optionally specify
as many <Argument> tags as you want. The text of each of these tags
is passed into the agent’s constructor as an array of Strings. So you
will need to convert the strings to the proper data types.
There are two more sections of interest in the config file. The
<ModelParameters> and the <Runner>. The ModelParameters tag
specifies the termination conditions of the scenario. The Runner
specifies which game engine is used. For the purpose of this tutorial
and assignments you should not need to modify these.
Visual Agent
You may have noticed that in the provided configuration files there are two Player tags with the same Id. One of these player tags specifies that a class called VisualAgent is used. VisualAgent is a convenient way of visualizing what is happening in a SEPIA scenario. You can use it for both manual control as well as visual debugging of an agent’s behavior.
While VisualAgent is useful for writing your agent, when you want to actually collect data or automate the testing the VisualAgent can be a hindrance. To run without the VisualAgent simply comment its player tag out of the configuration file. When you run without the visual agent the scenario will automatically run at full speed until the scenarios are over.
Note
For those not familiar an XML comment starts with <!--
and ends with -->. Just wrap what you are commenting in
that similar to a multiline comment in Java.